Line 1/Line
2 Setup
The Line
Setup tabs give detailed information about the VoIP network and may be
switched between Standard and Advanced view. The default view is Standard,
and may be changed by clicking the button shown below:

Settings
for Line 1 and Line 2 are identical.
In
Standard view, a user will have the option of configuring a SIP Config
tab, Features and Dial Plan settings. In Advanced view, the user is given
additional options under these tabs and the option of configuring Quality
of Service, Network Address Translation (NAT) and Voice Features.
Voice
Features - Advanced
View

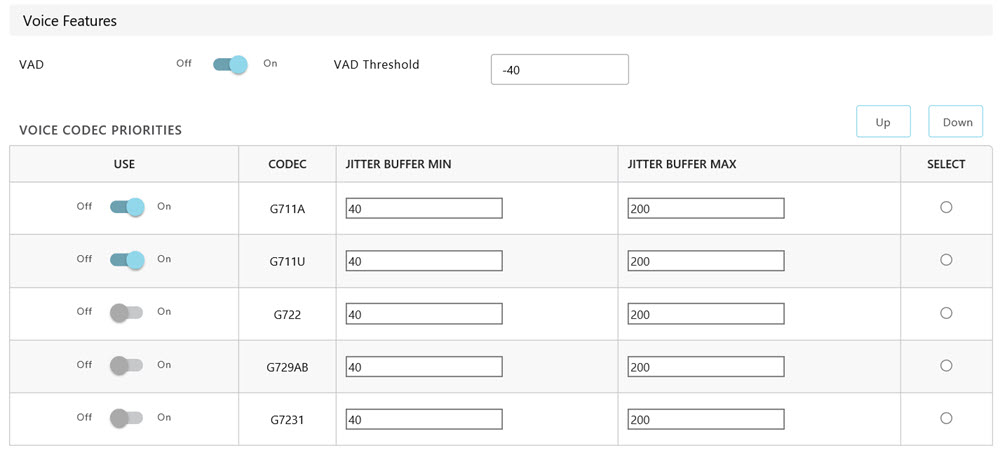
Voice
Activity Detection (VAD) - when
an audio level is not detected RTP packets will be restricted to save
bandwidth.
VAD Threshold is the level the
signal must fall below for VAD to be enabled. Range is -64 to 24 dBu.
Voice Codec Priorities: A list of supported voice codecs is shown
in descending order of priority. Clicking the UP or DOWN button after
selecting a codec from the SELECT column will adjust the priority order
of the codec. A user may omit or include use of a particular codec by
toggling the switch in the USE column.
Jitter Buffer Minimum and Jitter Buffer
Maximum fields may be set to compensate for network conditions.
Increasing the buffer sizes may improve call quality at the expense of
additional delay. Decreasing the buffer sizes may improve the delay at
the expense of call quality. Each codec may be adjusted individually.
